
Contao mit nginx und php-fpm installieren
Hier zeige ich euch wie ihr ein Contao 4.9 (LTS) als Docker Container mit nginx und php-fpm einrichtet.
Vorausgesetzt ihr habt bereits Traefik, wie hier beschrieben, am laufen.
Inhalt
1. Verzeichnisse anlegen
Zuerst legen wir uns einige Verzeichnisse und Dateien an, welche wir im Verlauf dieser Anleitung brauchen werden.
mkdir contao-fpm-stack
mkdir contao-fpm-stack/contao
mkdir contao-fpm-stack/contao/db
mkdir contao-fpm-stack/contao/www
mkdir contao-fpm-stack/contao/www/web
touch contao-fpm-stack/contao.ini
touch contao-fpm-stack/docker-compose.yml
touch contao-fpm-stack/Dockerfile
touch contao-fpm-stack/nginx.conf
2. docker-compose.yml
Wir bearbeiten die docker-compose.yml, ob mit vi, vim oder nano bleibt wieder euch überlassen.
version: '3'

services:
  nginx-contao-fpm:
    image: nginx
    container_name: nginx-contao-fpm
    hostname: example.com
    restart: unless-stopped
    volumes:
        - ./nginx.conf:/etc/nginx/conf.d/nginx.conf:ro
        - ./contao/www:/var/www/html
    links:
        - contao-php-fpm
    networks:
        - default
        - proxy
    labels:
        - "traefik.enable=true"
        - "traefik.http.routers.nginx-contao-fpm.entrypoints=http"
        - "traefik.http.routers.nginx-contao-fpm.rule=Host(`example.com`,`www.example.com`)" ##Domains anpassen##
        - "traefik.http.middlewares.nginx-contao-fpm-https-redirect.redirectscheme.scheme=https"
        - "traefik.http.routers.nginx-contao-fpm.middlewares=nginx-contao-fpm-https-redirect"
        - "traefik.http.routers.nginx-contao-fpm-secure.entrypoints=https"
        - "traefik.http.routers.nginx-contao-fpm-secure.rule=Host(`example.com`,`www.example.com`)" ##Domains anpassen##
        - "traefik.http.routers.nginx-contao-fpm-secure.tls=true"
        - "traefik.http.routers.nginx-contao-fpm-secure.tls.certresolver=http"
        - "traefik.http.routers.nginx-contao-fpm-secure.service=nginx-contao-fpm"
        - "traefik.http.services.nginx-contao-fpm.loadbalancer.server.port=80"
        - "traefik.docker.network=proxy"
        - "traefik.http.routers.nginx-contao-fpm-secure.middlewares=nginx-contao-redirect,secHeaders@file"
        - "traefik.backend=nginx"
        - "traefik.frontend.rule=Host:example.com"  ##Domain anpassen##
        #301 Weiterleitung auf example.com wenn www.example.com aufgrufen wird --> ##Domains anpassen##
        - "traefik.http.middlewares.nginx-contao-redirect.redirectregex.regex=^https://(www.)?(example.com)/(.+)?"
        - "traefik.http.middlewares.nginx-contao-redirect.redirectregex.replacement=https://example.com/$${3}"
        - "traefik.http.middlewares.nginx-contao-redirect.redirectregex.permanent=true"

  contao-php-fpm:
    build: ./
    container_name: contao-php-fpm
    restart: unless-stopped
    depends_on:
      - contao-fpm-db
    environment:
        DOCROOT: web
        PHP_DISPLAY_ERRORS: 1
        PHP_MEMORY_LIMIT: "-1"
        PHP_MAX_EXECUTION_TIME: 30
        WEB_DOCUMENT_ROOT: "/var/www/html"
    volumes:
      - ./contao/www:/var/www/html
      - ./contao.ini:/usr/local/etc/php/conf.d/contao.ini
    networks:
      - default
    labels:
        - "traefik.enable=false"

  contao-fpm-db:
    image: mariadb
    container_name: contao-fpm-db
    command: --transaction-isolation=READ-COMMITTED --log-bin=ROW
    restart: unless-stopped
    volumes:
      - /etc/localtime:/etc/localtime:ro
      - /etc/timezone:/etc/timezone:ro
      - ./contao/db:/var/lib/mysql
    environment:
      - MYSQL_ROOT_PASSWORD=password #SQL root Passwort eingeben
      - MYSQL_PASSWORD=password #SQL Benutzer Passwort eingeben
      - MYSQL_DATABASE=contao #Datenbank Name
      - MYSQL_USER=user #SQL Nutzername
      - MYSQL_INITDB_SKIP_TZINFO=1
    networks:
      - default

  phpmyadmin-contao:
    image: phpmyadmin/phpmyadmin
    container_name: phpmyadmin-contao
    environment:
      PMA_ARBITRARY: 1
    restart: unless-stopped
    labels:
      - "traefik.enable=true"
      - "traefik.http.routers.phpmyadmin-contao.entrypoints=http"
      - "traefik.http.routers.phpmyadmin-contao.rule=Host(`phpmyadmin-contao.example.com`)"  ##Domain anpassen##
      - "traefik.http.middlewares.phpmyadmin-contao-https-redirect.redirectscheme.scheme=https"
      - "traefik.http.routers.phpmyadmin-contao.middlewares=phpmyadmin-contao-https-redirect"
      - "traefik.http.routers.phpmyadmin-contao-secure.entrypoints=https"
      - "traefik.http.routers.phpmyadmin-contao-secure.rule=Host(`phpmyadmin-contao.example.com`)" ##Domain anpassen##
      - "traefik.http.routers.phpmyadmin-contao-secure.tls=true"
      - "traefik.http.routers.phpmyadmin-contao-secure.tls.certresolver=http"
      - "traefik.http.routers.phpmyadmin-contao-secure.service=phpmyadmin-contao"
      - "traefik.http.services.phpmyadmin-contao.loadbalancer.server.port=80"
      - "traefik.docker.network=proxy"
      - "traefik.http.routers.phpmyadmin-contao-secure.middlewares=secHeaders@file"
    networks:
      - proxy
      - default

networks:
  proxy:
    external: true
An den Stellen im Code wo die Kommentare sind müsst ihr noch eure Domain anpassen.
Und bei der Konfiguration für die Datenbank müsst ihr User und Passwort ändern, sonst heißt der Datenbank-Benutzer "user" und das Passwort ist dann "password".
3. Dockerfile
Da das Docker Image "php:7.4-fpm" kein php Modul "intl" für die Internationalisierung von Contao sowie kein Modul für "mysqli" und diverse weitere Module wie "zip", "libpng" und "libjpeg" enthält, müssen wir mit Hilfe eines Dockerfile und dem Build Befehl das Image modifizieren.
Wir bearbeiten also das Dockerfile wie folgt:
FROM php:7.4-fpm
RUN apt-get -y update \
    && apt-get install -y libicu-dev \
    && docker-php-ext-configure intl \
    && docker-php-ext-install intl \
    && apt-get install -y libfreetype6-dev \
    && apt-get install -y libjpeg62-turbo-dev \
    && apt-get install -y libpng-dev \
    && docker-php-ext-configure gd --with-freetype --with-jpeg \
    && docker-php-ext-install -j$(nproc) gd \
    && apt-get install -y libzip-dev \
    && docker-php-ext-install zip \
    && docker-php-ext-configure mysqli --with-mysqli \
    && docker-php-ext-configure pdo_mysql --with-pdo-mysql \
    && docker-php-ext-install mysqli \
    && docker-php-ext-install pdo_mysql
4. contao.ini
Die Datei "contao.ini" ist unsere eigene "php.ini" in der wir die Standard Werte aus dem Image überschreiben können. Damit der Composer von Contao richtig läuft muss in jedem Fall das Memory Limit erhöht werden, da dies im Standard nur auf 128 MB eingestellt ist. Alle anderen Werte könnt ihr auch gerne kleiner halten wie in diesem Beispiel.
file_uploads = On
memory_limit = 1024M
upload_max_filesize = 512M
post_max_size = 512M
max_execution_time = 300
max_input_time = 1000
max_input_vars = 3000
5. nginx.conf
Nginx ist unser Webserver, welcher die Seite ausliefert. Der "php:7.4-fpm" Container ist nur rein für php zuständig. Nun brauchen wir also eine Konfiguration für nginx um diesem zu sagen wie er php Dateien behandeln soll.
Wir bearbeiten die Datei nginx.conf.
upstream php-handler {
    server contao-php-fpm:9000;
}

server {
    listen 80;
    server_name example.com;

    # Path to the root of your installation
    root /var/www/html/web;

    # set max upload size
    client_max_body_size 512M;
    fastcgi_buffers 64 4K;

    # Enable gzip but do not remove ETag headers
    gzip on;
    gzip_vary on;
    gzip_comp_level 4;
    gzip_min_length 256;
    gzip_proxied expired no-cache no-store private no_last_modified no_etag auth;
    gzip_types application/atom+xml application/javascript application/json application/ld+json application/manifest+json application/rss+xml application/vnd.geo+json application/vnd.ms-fontobject application/x-font-ttf application/x-web-app-manifest+json application/xhtml+xml application/xml font/opentype image/bmp image/svg+xml image/x-icon text/cache-manifest text/css text/plain text/vcard text/vnd.rim.location.xloc text/vtt text/x-component text/x-cross-domain-policy;

    # HTTP response headers borrowed from `.htaccess`
    add_header Referrer-Policy                      "no-referrer"   always;
    add_header X-Content-Type-Options               "nosniff"       always;
    add_header X-Download-Options                   "noopen"        always;
    add_header X-Frame-Options                      "SAMEORIGIN"    always;
    add_header X-Permitted-Cross-Domain-Policies    "none"          always;
    add_header X-Robots-Tag                         "none"          always;
    add_header X-XSS-Protection                     "1; mode=block" always;

    # Remove X-Powered-By, which is an information leak
    fastcgi_hide_header X-Powered-By;

    # Specify how to handle directories -- specifying `/index.php$request_uri`
    # here as the fallback means that Nginx always exhibits the desired behaviour
    # when a client requests a path that corresponds to a directory that exists
    # on the server. In particular, if that directory contains an index.php file,
    # that file is correctly served; if it doesn't, then the request is passed to
    # the front-end controller. This consistent behaviour means that we don't need
    # to specify custom rules for certain paths.
    index index.php index.html /index.php$request_uri;

    location = /robots.txt {
        allow all;
        log_not_found off;
        access_log off;
    }

    # Rules borrowed from `.htaccess` to hide certain paths from clients
    location ~ ^/(?:build|tests|config|lib|3rdparty|templates|data)(?:$|/)  { return 404; }
    location ~ ^/(?:\.|autotest|occ|issue|indie|db_|console)              { return 404; }

    # Ensure this block, which passes PHP files to the PHP process, is above the blocks
    # which handle static assets (as seen below). If this block is not declared first,
    # then Nginx will encounter an infinite rewriting loop when it prepends `/index.php`
    # to the URI, resulting in a HTTP 500 error response.
    location ~ \.php(?:$|/) {
        fastcgi_split_path_info ^(.+?\.php)(/.*)$;
        set $path_info $fastcgi_path_info;

        try_files $fastcgi_script_name =404;

        include fastcgi_params;
        fastcgi_param SCRIPT_FILENAME $document_root$fastcgi_script_name;
        fastcgi_param PATH_INFO $path_info;
        fastcgi_param HTTPS on;

        fastcgi_param modHeadersAvailable true;         # Avoid sending the security headers twice
        fastcgi_param front_controller_active true;     # Enable pretty urls
        fastcgi_pass php-handler;

        fastcgi_intercept_errors on;
        fastcgi_request_buffering off;
    }

    location ~ \.(?:css|js|svg|gif)$ {
        try_files $uri /index.php$request_uri;
        expires 6M;         # Cache-Control policy borrowed from `.htaccess`
        access_log off;     # Optional: Don't log access to assets
    }

    location ~ \.woff2?$ {
        try_files $uri /index.php$request_uri;
        expires 7d;         # Cache-Control policy borrowed from `.htaccess`
        access_log off;     # Optional: Don't log access to assets
    }

    location / {
        try_files $uri $uri/ /index.php$request_uri;
    }
}
6. Build und start der Container
Nachdem nun alles fertig konfiguriert ist können wir unsere Container bauen und starten. Für den Build Befehl benötigen wir allerdings sudo Rechte. Wenn die Container erstmal gebaut sind können wir sie starten und stoppen auch ohne sudo.
Bauen wir also unsere Container ..
sudo docker-compose up -d --build ##Wenn ihr im Verzeichnis contao-fpm-stack befindet, wenn nicht dann##
sudo docker-compose -f ~/contao-fpm-stack/docker-compose.yml up -d --build
7. Installation von Contao
Nun können wir beginnen Contao zu installieren. Dazu kopieren wir zuerst die "contao-manager.phar" in das Verzeichnis "contao-fpm-stack/contao/www/web/". Dann benennen wir die Datei zu "contao-manager.phar.php" um und ändern noch den Besitzer des Verzeichnisses "contao-fpm-stack/contao/www/".
cd ~/contao-fpm-stack/contao/www/web/
wget https://download.contao.org/contao-manager/stable/contao-manager.phar
mv contao-manager.phar contao-manager.phar.php
sudo chown -R www-data:www-data ~/contao-fpm-stack/contao/www/
Jetzt geben wir in unserem Browser "https://example.com/contao-manager.phar.php" ein.
Wir sollten nun folgendes sehen:
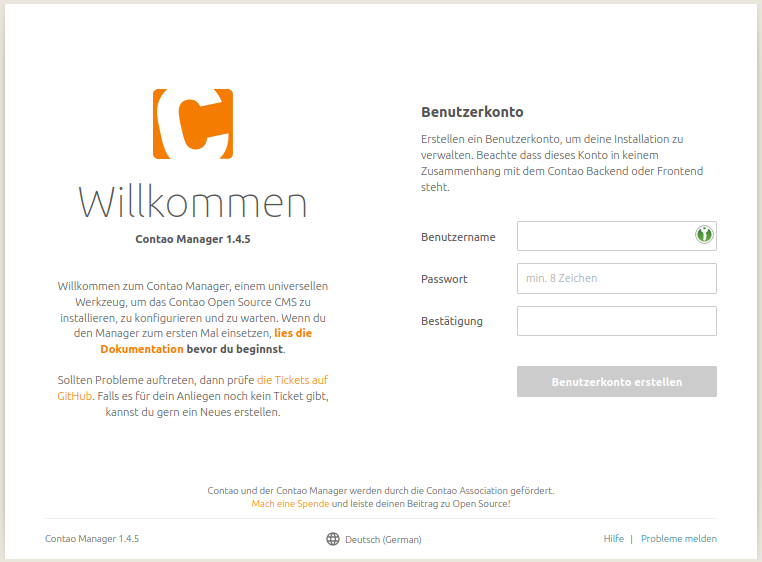
Ihr könnt nun einen Benutzer anlegen und mit der Installation von Contao weitermachen.
Die komplette Installation werde ich hier nicht weiter beschreiben, das könnt ihr hier nachlesen.